In this post, we will learn how to implement Omni Channel and in my previous post, we have implemented the Live Agent if you have not read yet then Read Here.
Prerequisite: Live agent must be enabled in order to use Omni Channel.

Problem while using Live Agent: – The company XYZ has now successfully enabled the live agent at their company site and it was working fine however as business growing company the Global Support VP is getting complaints
- Some agents are getting many cases and some are not getting any cases at all.
- Agents need to Case manually from the Queues if the case is created manually or any other resource like Email-to-Case. And assigning the cases manually leads the wastage of time.
- Also, it is hard to manage what is the capacity of the particular agent and what is the traffic.
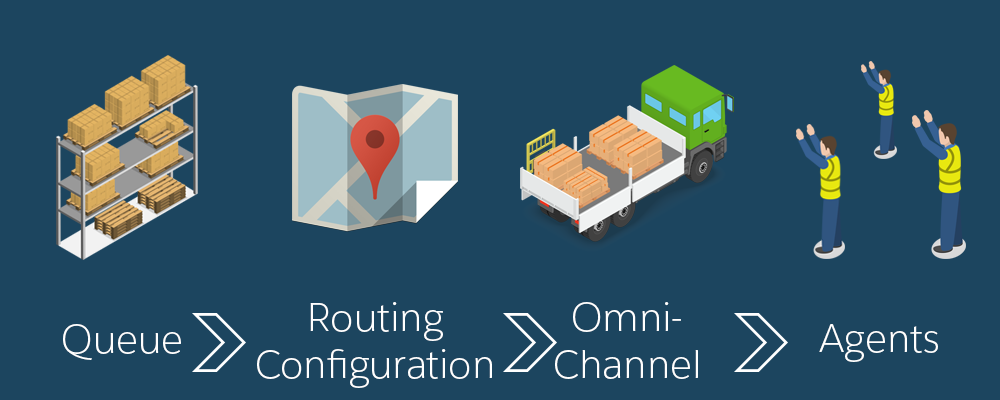
Salesforce Admin has come up with an idea to implement the Omni Channel which will resolve all above problem and will increase the efficiency of the Support Agent.

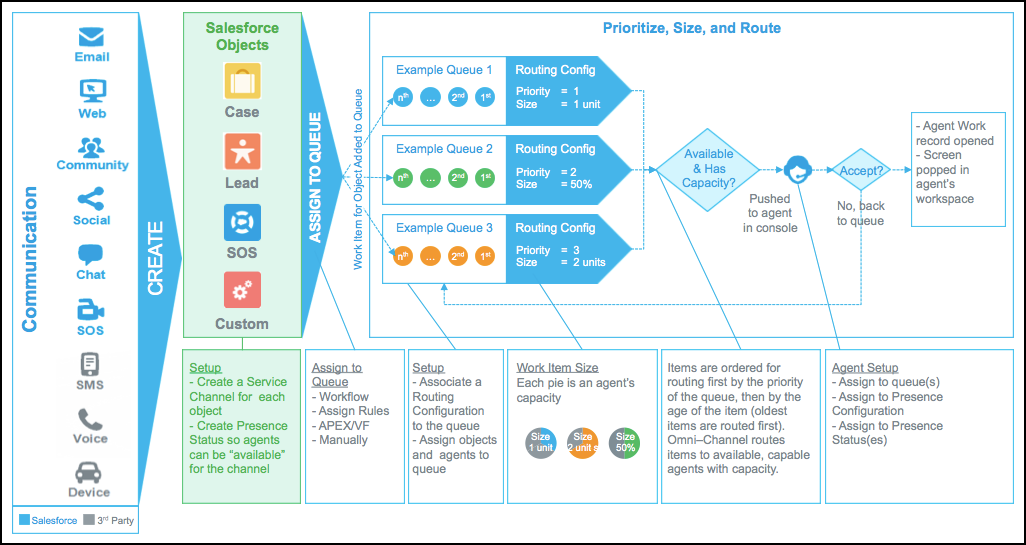
Introduction to Omni Channel:- Omni-Channel is a flexible, customizable feature, and you can configure it declaratively—that is, without writing code. Use Omni-Channel to manage the priority of work items, which makes it a cinch to route important work items to agents quickly. Manage your agents’ capacity to take on work items so that they’re given only the number of assignments that they can handle.
Best of all, Omni-Channel routes all these assignments to the correct agents automatically. Agents no longer have to pick and choose work assignments manually from a queue, which saves everyone in your call center time, effort, and brainpower.
Permission to set up the Omni Channel is Customize Application at profile level.
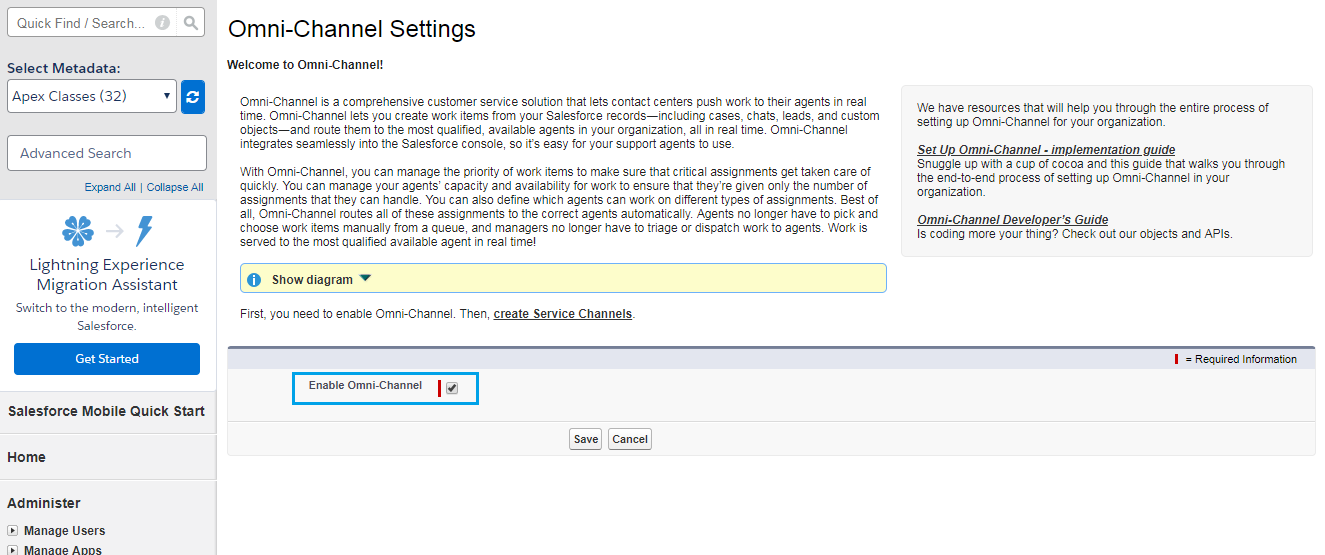
Step1 – Enable Omni Channel:- Setup -> Build -> Customize -> Omni-Channel -> Omni-Channel Settings -> Select Enable Omni-Channel Checkbox -> Save
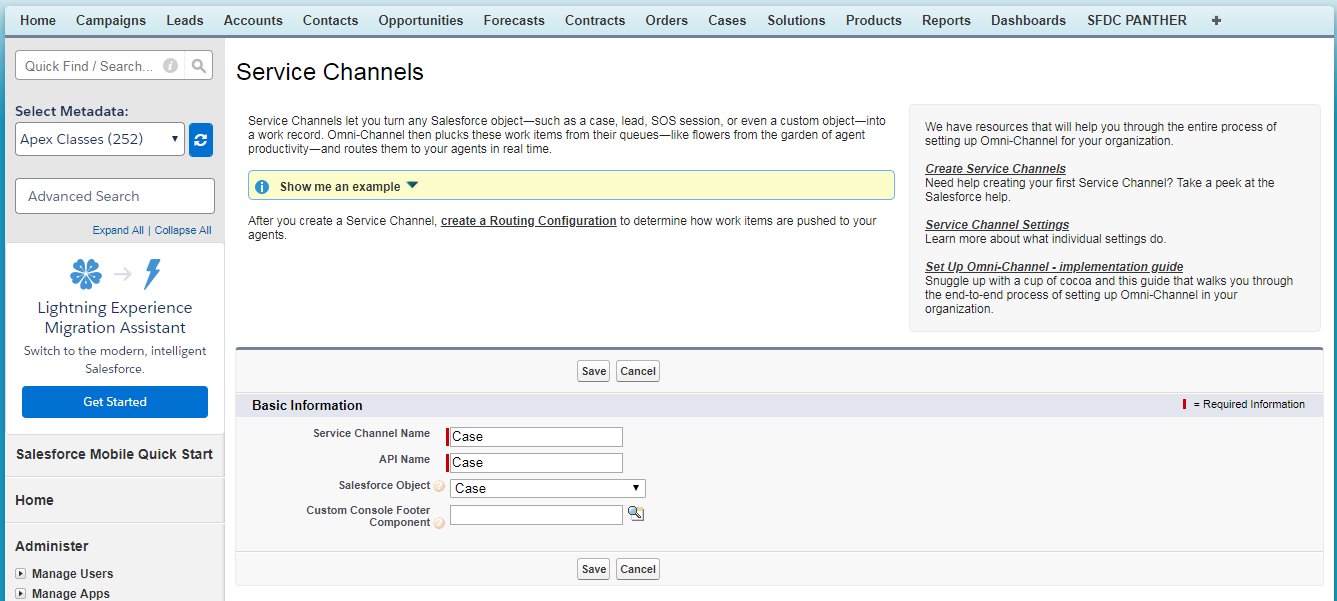
Setp2 – Create Service Channel:- Service Channels let you turn any Salesforce object―such as a case, lead, SOS session, or even a custom object―into a work record. Omni-Channel then plucks these work items from their queues―like flowers from the garden of agent productivity―and routes them to your agents in real time.
Setup -> Build -> Customize -> Omni-Channel -> Service Channels -> New ->
Step3 – Create Routing Configurations: – Routing Configurations determine how work items are routed to agents. They let you prioritize the relative importance and size of work items across your Omni-Channel Queues. That way, the most important work items are handled accordingly, and work is evenly distributed to your agents. After all, we want to make sure every agent gets to have an equal amount of fun, right?
Setup -> Build -> Customize -> Omni-Channel -> Routing Configurations -> New ->
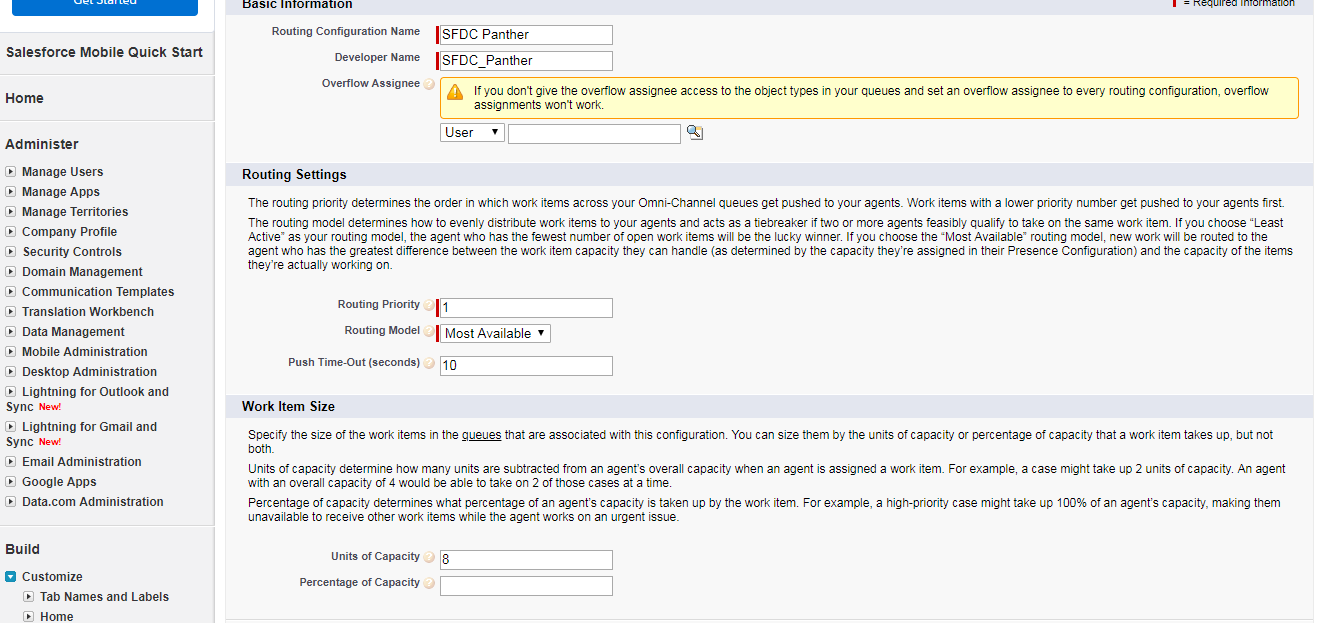
Explanation of above Screenshot
- Overflow Assignee:- Sets the user or queue that Omni-Channel routes items to when your org reaches Omni-Channel limits.
- Routing Priority: – The order in which work items from the queue that are associated with this routing configuration are routed to agents.
- Routing Model: Specify how incoming work items are directed to agents using Omni-Channel.
- Least Active: – Incoming work items are routed to the agent with the least amount of open work.
- Most Available: – Incoming work items are routed to the agent with the greatest difference between work item capacity and open work items.
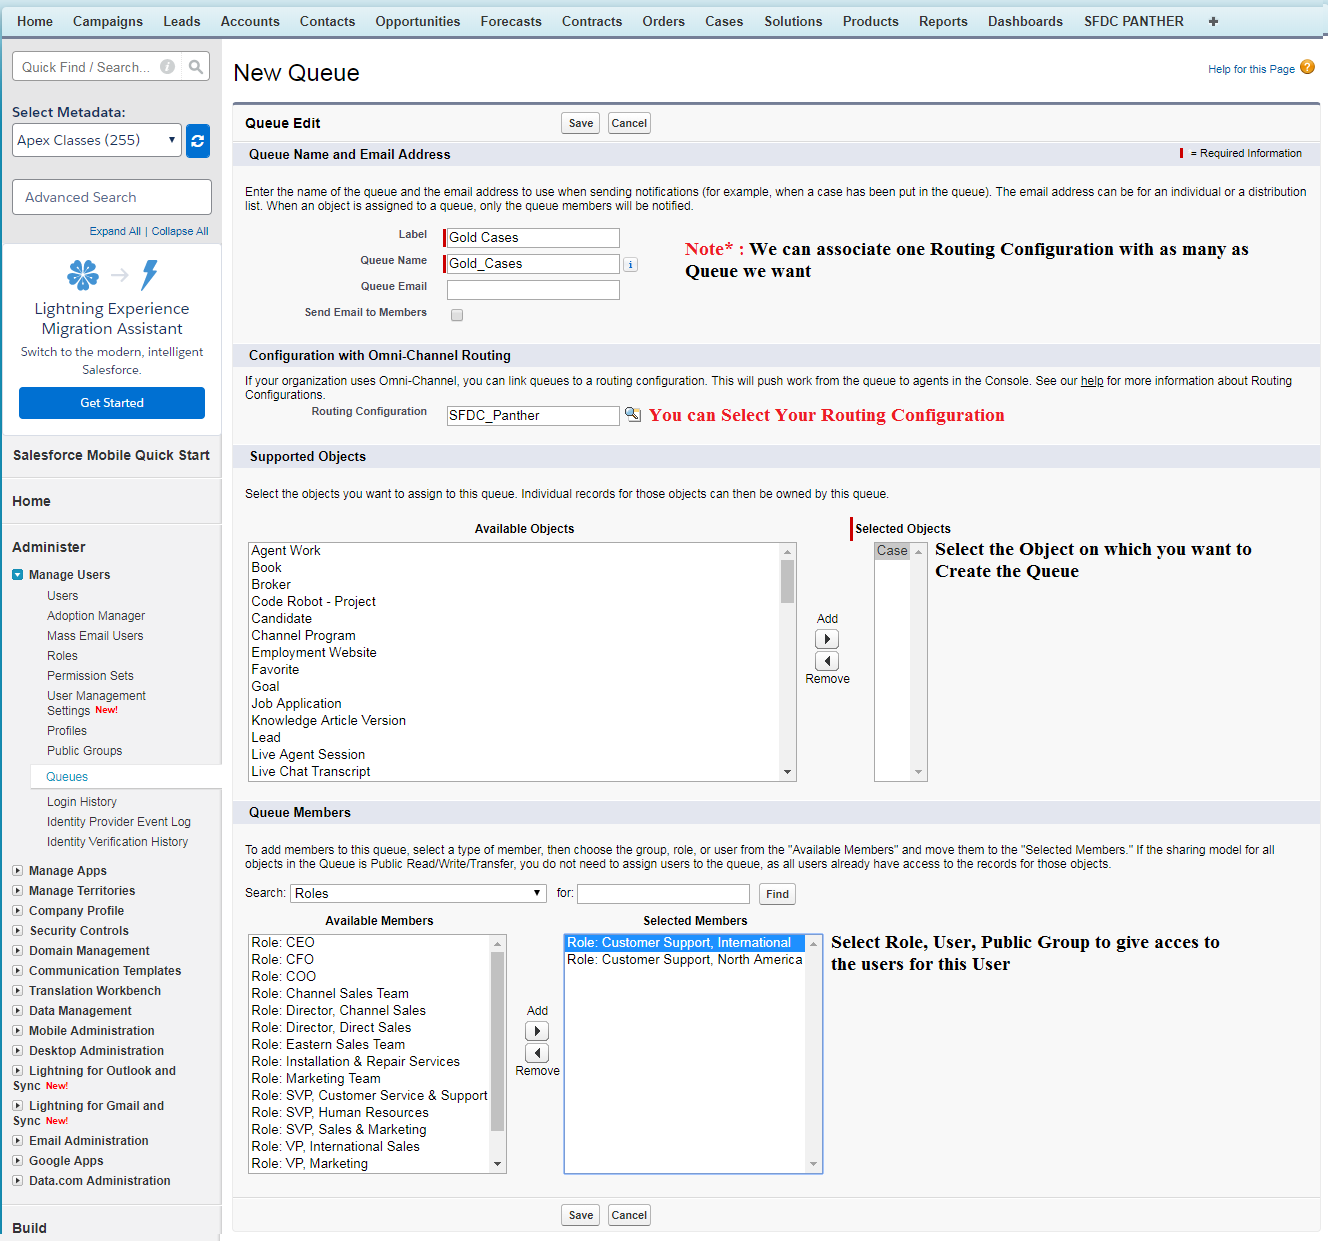
Step4 – Create Queue and Associated with Routing Configurations: –
Setup -> Administrator -> Manage Users -> Queues -> New ->
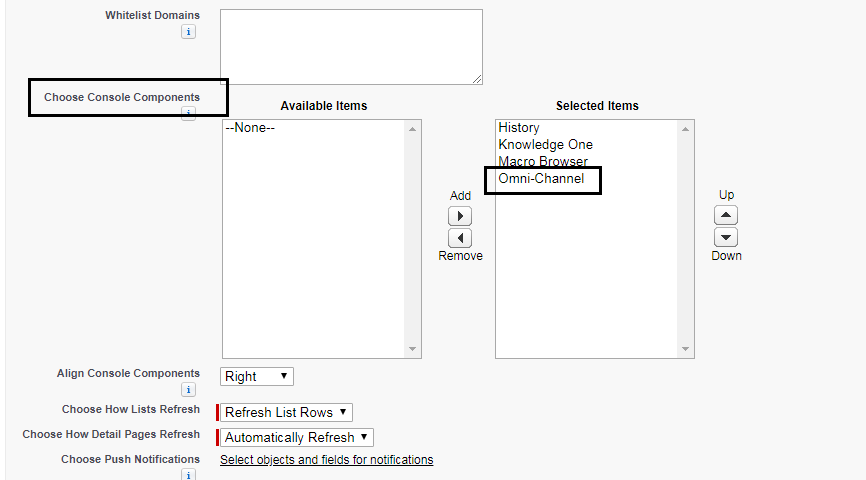
Step5 – Add Omni Channel to the Console Application: –
Setup -> Create -> Apps -> Edit Next to Sample Console App(OR You may Select your) -> Scroos Down to “Choose Console Components” Section -> Add Omni Channel From “Available Items” to “Selected Items”
Now, as we have done almost part of implementing the Omni Channel. Let’s have a look how our console application looks like
Click on App Launcher and Select Sample Application

Step6 – Add Presence Status to Omni Channel: –
To see the list of available status like Online, Offline, Away, Available For Cases, Available For Chat and etc. We need to create the Presence Status.
Setup -> Build -> Customize -> Omni-Channel -> Presence Status -> New ->

Repeat the above process to add more presence status.
Step7 – Add Presence Status to Correct Users Profile: –
Adding the presence status to the Omni Channel that does not mean it will be available in Omni Channel Utility. To make visible these statuses we need to add to the appropriate user’s profile or permission set.
Setup -> Manage Users -> Profiles -> Select the profile on which you want to enable the status (in this demo we will add in System Administrator Profile)-> Scroll down to “Enabled Service Presence Status Access” section and Click Edit ->
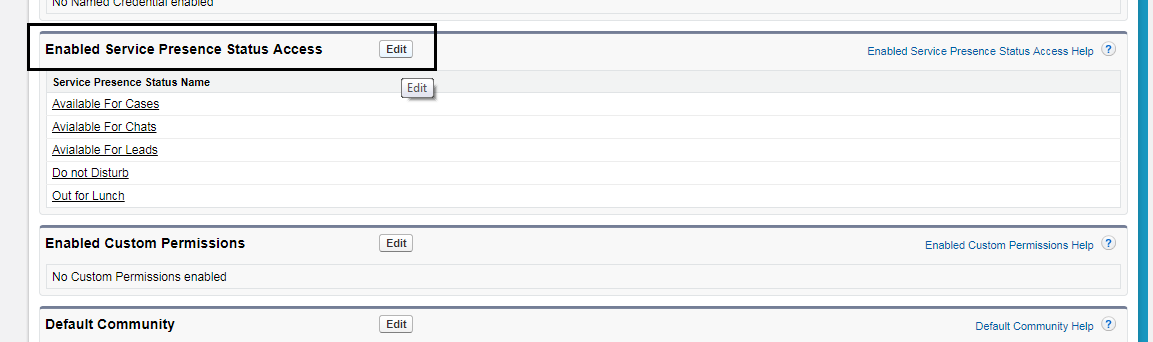
Add presence status from “Available Service Presence Statuses” to “Enabled Service Presence Statuses” Section and save.

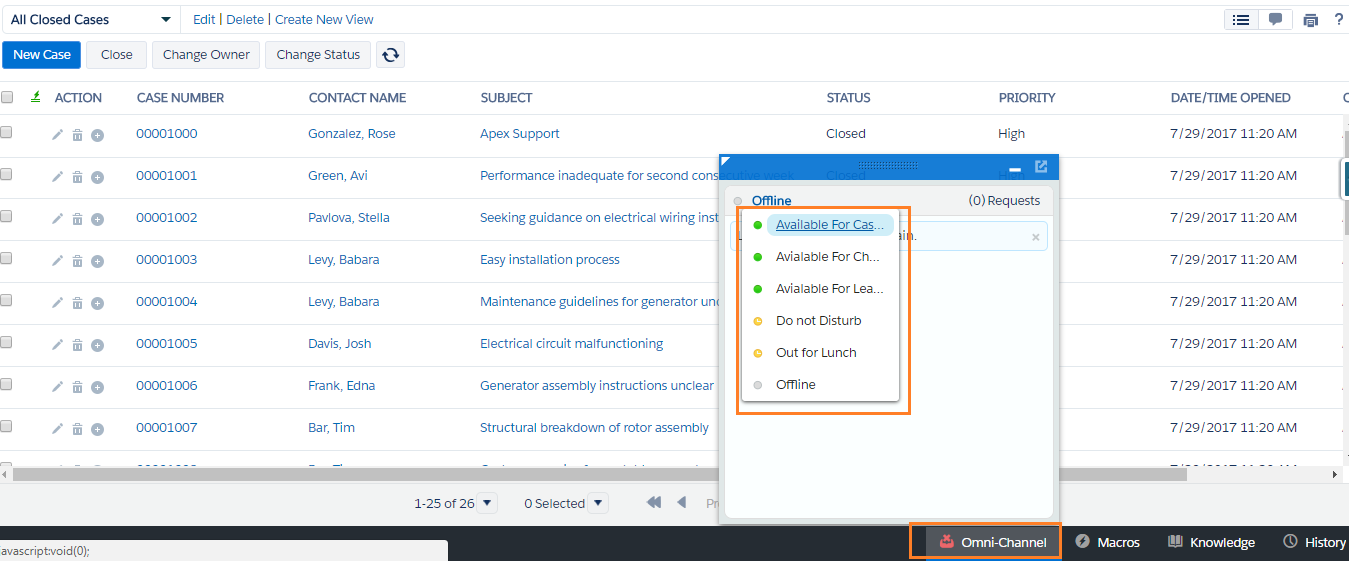
Step8 – See if presence status is available in Omni Channel utility or Not: –
Click on App Launcher and Select Sample App
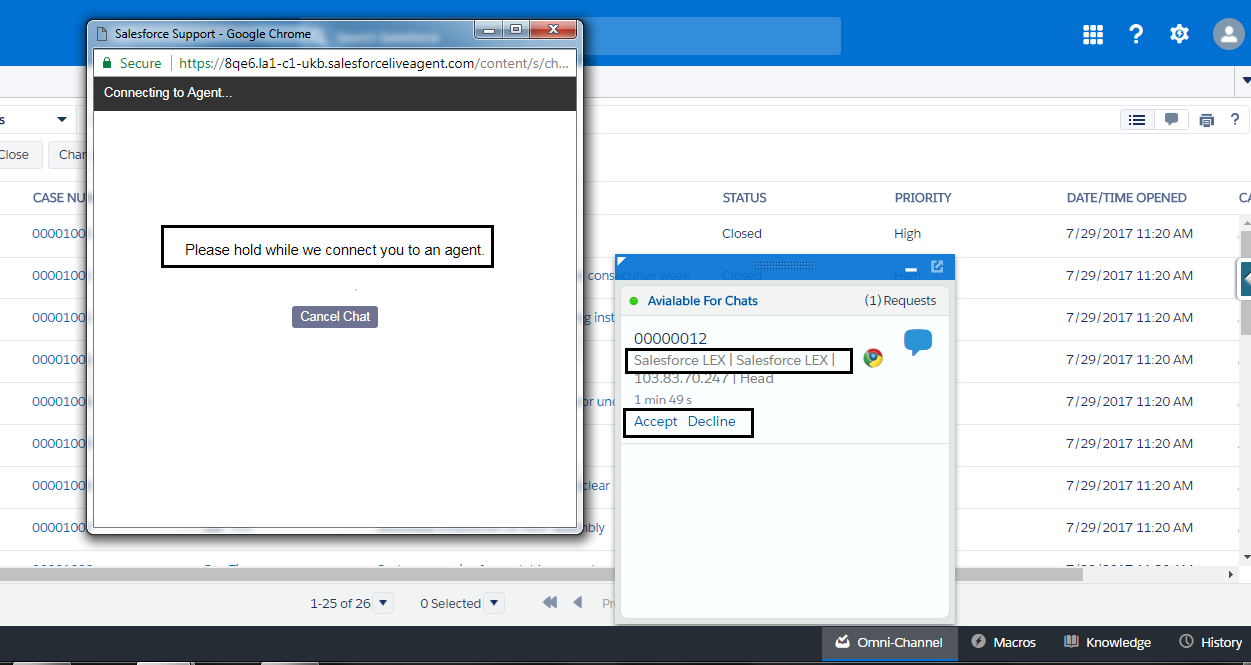
Now, in Final let us test the App. Copy and paste the code if Live Chat Deployment and Chat Button that we did create in our previous post and save as .html file. if you have not implemented the Live Agent refer this link to implement the same.
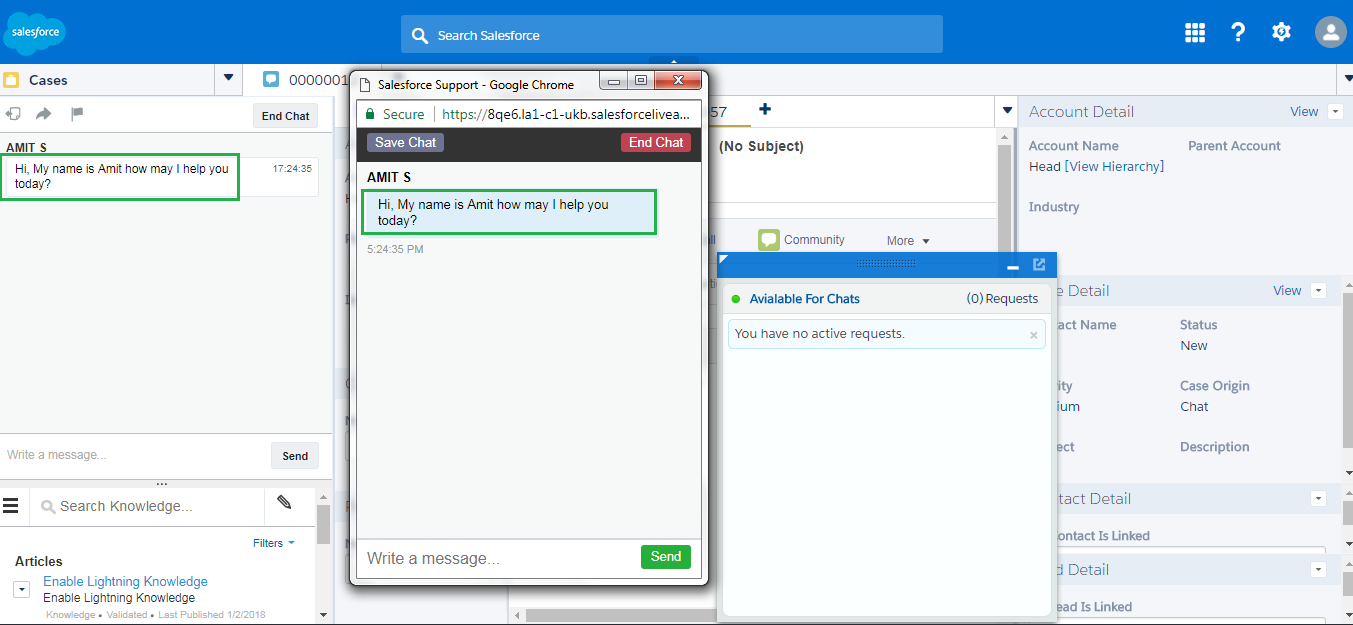
From Omni channel Select any online statue and run the HTML file of Live Agent that we did save earlier.
If you are facing any issues please come up in the comments section with.
Sharing is Caring 🙂
Resources:-
- Live Agent
- Omni Channel
- Trailhead


 Sharing is caring.
 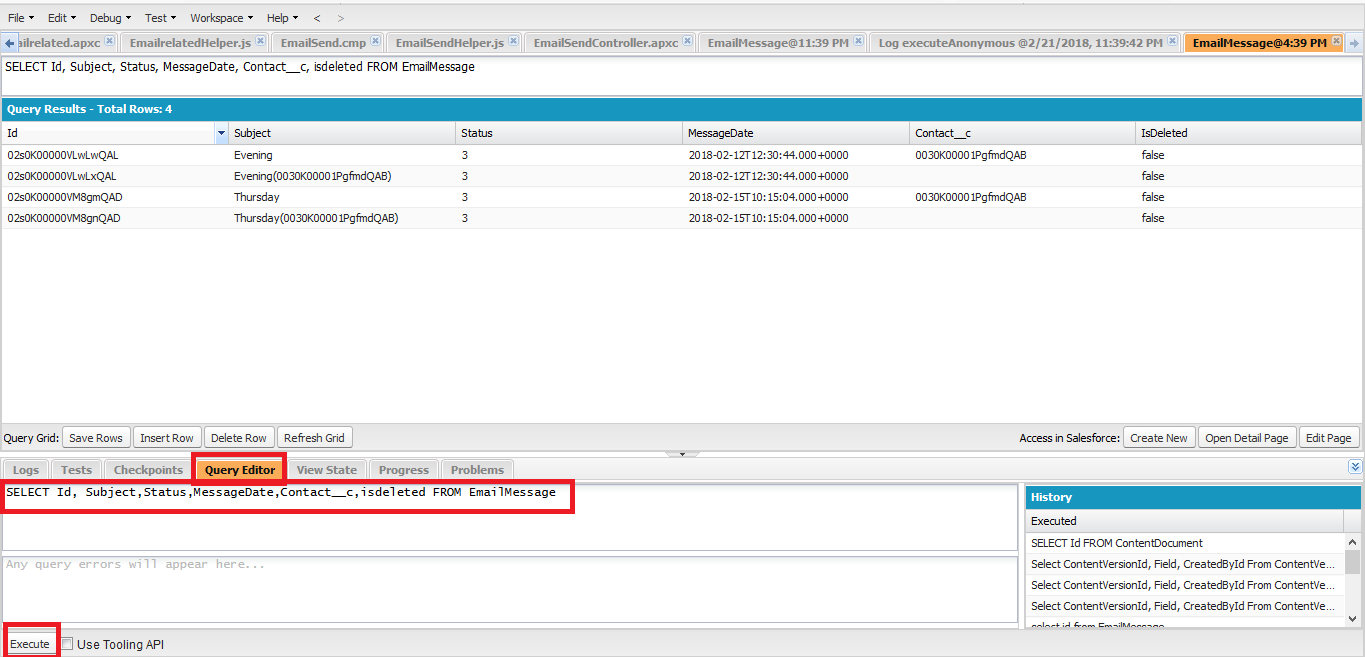 2.Copy the Records By Right Clicking Mouse Inspect Element and spot the Div element as per below screenshot.
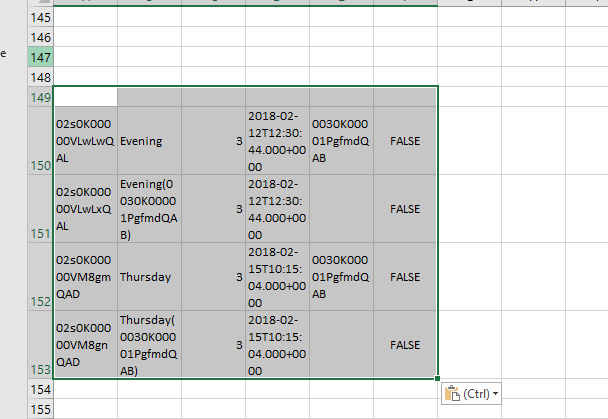
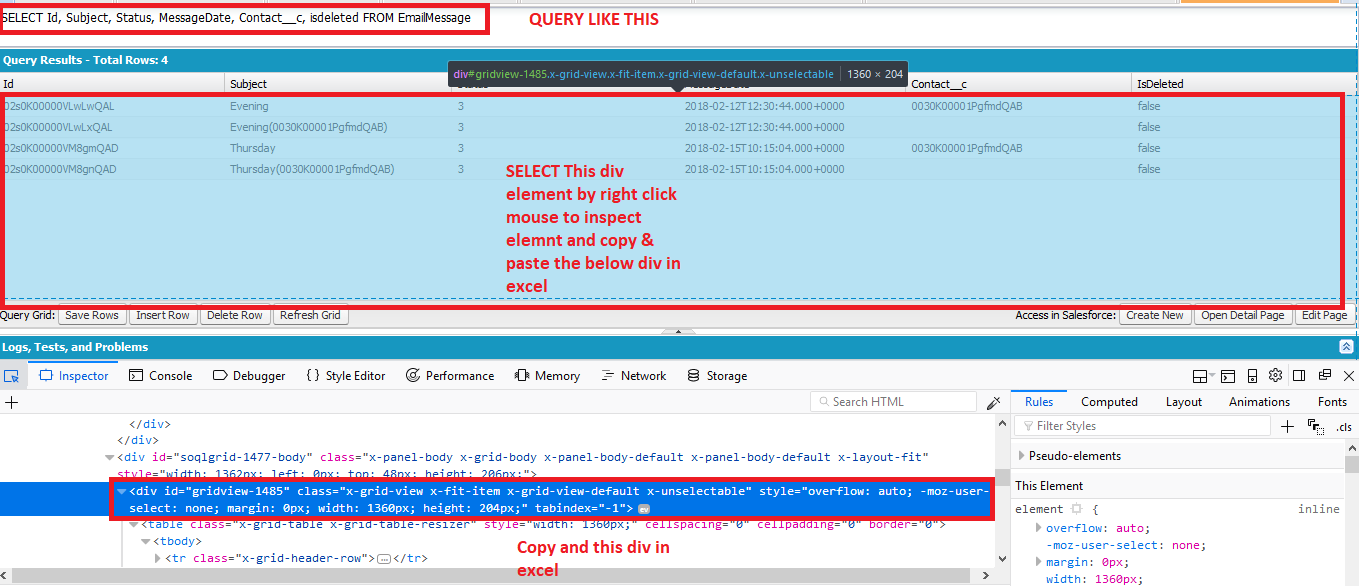 3.Copy and Paste the div element in Excel sheet: